
Applying kinesiology tape to your shoulder can seem daunting, but it can be straightforward with the proper techniques. First, prepare the area by ensuring it’s clean and dry. When you apply the tape, gently pull it to the desired tension and place it over the affected area, following the natural contours of your shoulder. Rub the kinesiology tape after application to activate the adhesive for optimal stickiness. As you move through the steps, remember that the tape should support your shoulder movements without restricting them. Whether you want to address an injury or provide general support, the correct application will help you maintain an active lifestyle.
Benefits of Kinesiology Tape for Shoulder Support
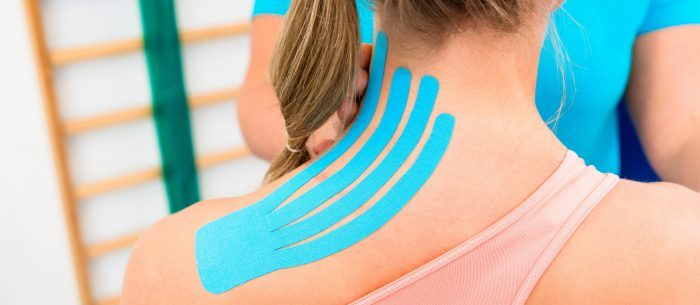
Kinesiology tape for shoulder support offers numerous benefits, including reduced pain and enhanced stability. Applying the tape correctly helps gently pull the skin and underlying tissues, promoting better circulation and reducing inflammation. For those who frequently pull their shoulder during activities, kinesiology tape can provide the necessary support to prevent further injury and facilitate quicker recovery, allowing for continued activity while healing occurs.
The Role of KT Tape in Alleviating Shoulder Pain
If you’re struggling with shoulder muscle pain, KT Tape can be a valuable ally. Kinesiology tapes are designed to mimic the skin’s elasticity, allowing you to move freely while still providing support. Applying tape strips can help alleviate the discomfort from conditions like a frozen shoulder or a dislocated shoulder. The tape lifts the skin slightly, reducing pressure on the underlying tissues and potentially easing pain associated with movement.
Efficacy and Science Behind Kinesiology Taping for Shoulders
When you apply the tape to your shoulder blade and surrounding areas, it’s not just about support but also pain relief. The gentle pull from the tape can help align and stabilize the joint, which may alleviate pain. Rubbing the kinesiology tape after application helps to activate the adhesive, ensuring the tape stays in place. Scientific studies suggest that taping can provide immediate relief and facilitate the body’s natural healing process when athletes pull their shoulders.
Pre-Taping Preparations for Optimal Adhesion
Before you stretch the tape onto your shoulder, proper preparations are vital to ensure it adheres well and provides the necessary support. Ensuring your skin is primed for application will help the tape stick better and last longer.
Ensuring Your Skin Is Ready for Kinesiology Tape
For the kinesiology tape to adhere properly, your skin should be free of oils, lotions, and sweat. Take a moment to clean the area thoroughly before application to ensure the best possible adhesion.
Cleaning the Skin Before Taping
Start by washing your shoulder area with soap and water to remove debris or oils. Dry the skin thoroughly, as moisture can prevent the tape from sticking. If you have excess hair on your shoulder, consider shaving it to create a smoother surface for the tape to adhere to.
Using Pre-Tape Spray to Enhance Stickiness
For enhanced adhesion, consider using a pre-tape spray before applying the kinesiology tape. This product is designed to create an extra tacky surface on your skin, which can be especially helpful if you have oily skin or are sweating during activities.
Essential Tools for a Smooth Application Process
Having the right tools on hand will make the application process easier and more effective. Ensure you have quality kinesiology tape, scissors for cutting, and additional items like pre-tape spray or skin wipes.
Selecting the Right Kinesiology Tape
Choose a kinesiology tape that is flexible, durable, and suitable for your skin type. Look for tapes that offer the right elasticity and adhesive strength balance to provide support without causing skin irritation.
Scissors and Other Accessories
A good pair of scissors is essential for cutting the tape to the correct length and shape. Additionally, having items like a skin marker for precision and a tape roller for even pressure can be helpful for those new to taping.
Measuring and Cutting the Kinesiology Tape
Measure the tape according to the size of your shoulder area, allowing for some stretch. Cut the tape to the desired length, keeping in mind that it should cover the area adequately without hindering movement.
Customizing Tape Length for Your Specific Shoulder Needs
Every shoulder is different, so it’s essential to customize the length of the tape to your specific needs. Remember to stretch the tape slightly while measuring to account for the elasticity and ensure a snug, supportive fit.
Techniques for Cutting Tape to the Ideal Shape
Cutting the tape to the right shape can enhance its effectiveness. Round the corners to prevent peeling, and consider different shapes like ‘Y’ or ‘X’ to conform to the contours of your shoulder and provide targeted support.
Step-by-Step Instructions for Applying Kinesiology Tape to the Shoulder
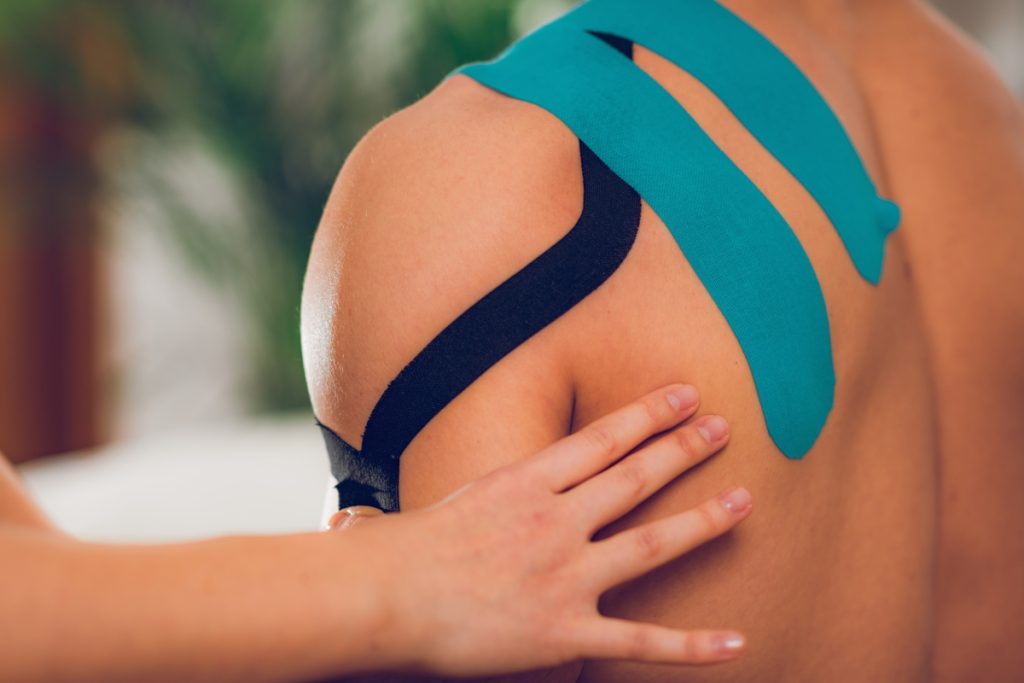
Begin by ensuring your shoulder is clean and dry. Peel the tape backing off and apply the Kinesio tape from the upper shoulder towards the chest or back, following the natural line of your shoulder muscles. The KT tape can be worn during various activities, so ensure it’s applied to complement your shoulder movements.
Initial Placement: Starting With the Front of the Shoulder
Begin by anchoring the kinesiology tape at the front of your shoulder, close to the collarbone. This initial placement is crucial as it will support shoulder movements without restricting your range of motion. Ensure the tape backing is peeled off gently to maintain the tape’s adhesiveness.
Step 1: Positioning the Tape Correctly
Position the tape over the muscle area that needs support, extending from the front of your shoulder toward your back. The tape should follow the natural curve of your muscles. Remember to apply the tape with minimal stretch to avoid skin irritation or discomfort.
Securing the Tape Across the Shoulder Blade
Next, pull the tape across your shoulder blade, keeping it flat and wrinkle-free. This will help to stabilize the area and provide the necessary support as you move.
Step 2: Applying Pressure and Heat
After laying down the tape, apply firm pressure to secure it in place. Rub over the tape to activate the heat-sensitive glue, which will help the tape adhere better to your skin. Be thorough with the pressure application to ensure the tape backing bonds well with the skin.
Finalizing the Application on the Back of the Shoulder
Ensure the end of the tape is firmly applied to the back of your shoulder with no creases or bubbles, providing a smooth finish that moves with your body.
Step 3: Smoothing Out the Edges for Secure Adhesion
Check the edges of the tape to ensure they are well adhered to your skin. Smooth out any lifted areas to reduce the chance of the tape peeling prematurely. The better the adhesion, the longer your application will last through daily activities.
Wrapping Up
As you conclude your shoulder taping journey, remember that Kinesio taping is an ally in managing shoulder injuries. Whether you’re dealing with rotator cuff strains, rotator cuff tears, or general shoulder joint discomfort, a meticulously applied strip of tape can support the anterior deltoid, posterior deltoid, and rotator cuff muscles. When placing the tape, ensure the anterior tail adheres near the deltoid tuberosity of the upper arm bone. In contrast, the posterior tail secures across to the opposite shoulder, reinforcing without causing skin irritation. Always consult with a physical therapist to optimize your application for issues such as rotator cuff injury, and remember to apply the tape with care to the upper trapezius for comprehensive shoulder support.